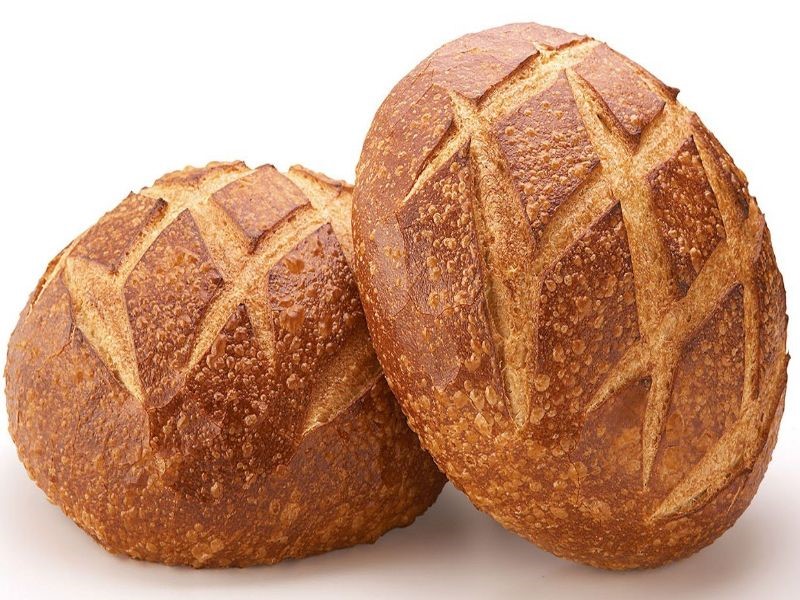
Sourdough
My first taste of sourdough bread was, where else but in San Francisco. My mom had lived there for a few years and in my youth, we visited the city. There were lots of culinary adventures which remain memorable no matter how many times I’ve returned, yet the sourdough always seems tastier in the City by the Bay.
That first trip, we gleefully returned home with loaves to share from Boudin Bakery, where they’ve been turning out sourdough since 1849. We brought them home because that was before sourdough was available, well, everywhere.
Sourdough’s San Francisco history dates to 1848, the start of the gold rush. Miners would carry sourdough starters with them to ensure they’d have access to freshly baked bread. Starters and bread were also traded for other goods.
In 1849, Isidore Boudin, the son of French bakers, arrived in San Francisco and opened Boudin Bakery, combining French bread-making techniques with a starter he received from a miner. Amazingly, that starter still lives on, flavoring their breads.
It all starts, pardon the pun, with the starter – flour and water. The wild naturally occurring yeast in the flour and air breaks down sugars into carbon dioxide. As the starter activates, gas bubbles are created, emitting a sour aroma. You feed the starter every day by removing half of it and adding new flour and water. With the right care, your starter could get passed down through generations.
How about making starter for yourself, family and friends? Let me know how it goes.
Wishing you joy in the kitchen,
Michele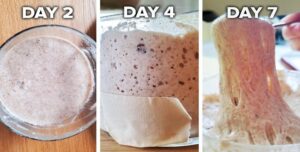 Sourdough Starter
You’ll need a kitchen scale, two 1-quart jars you’ll loosely cover with either a porous cloth or a lid resting on top of the jar; whole grain dark rye flour; unbleached all-purpose flour; a silicone spatula and instant-read thermometer to monitor to starter’s temperature to ensure it’s in the range for fermentation. As for the water, if it’s high in chlorine or the disinfectant chloramine, it can impede fermentation. If you can smell chemicals from your faucet, use bottled water.
Day 1
To a clean 1-quart glass jar, add 100g whole grain rye flour and 125g warm (68°-70° F) water.
Stir everything together thoroughly; make sure there’s no dry flour anywhere. Cover the container loosely and let the mixture sit at warm room temperature (about 70° F) for 24 hours. The colder the room temperature, the more slowly the starter will grow. If the normal temperature in your home is below 68° F, find a warmer spot to develop the starter, like the top your water heater, refrigerator or another appliance that might generate ambient heat; the turned-off oven with the light on is also an option.
Day 2
You may see no activity at all in the first 24 hours or you may see a bit of growth or bubbling. To a clean 1-quart jar, add 75g of the mixture from Day 1 (discard the rest), 50g whole grain rye flour, 50g unbleached all-purpose flour and 115g cool water if your house is warm or lukewarm water if it’s cold. Mix well, cover and let mixture rest at room temperature for 24 hours.
Day 3
By the third day, you’ll likely see some activity: Bubbling; a fresh, fruity aroma and some evidence of expansion. To a clean jar, add 75g of the mixture from Day 2 (discard the rest), 50g whole grain rye flour, 50g unbleached all-purpose flour and 115g cool water if your house is warm or lukewarm water if it’s cold. Mix starter, flour and water, cover and keep somewhere warm for 24 hours.
Day 4
It’s now time to begin two daily feedings, as evenly spaced out as your schedule allows.
In a clean jar, add 75g of the mixture from Day 3 (discard the rest), 50g whole grain rye flour, 50g unbleached all-purpose flour and 115g cool water if your house is warm or lukewarm water if it’s cold. Mix and let rest for 12 hours.
After 12 hours, repeat the discarding and feeding you previously did. Let the mixture rest overnight.
Days 5 and 6
For days 5 and 6, continue the same twice a day procedure as Day 4, using the same jar for these feedings.
Day 7 and Forward
Conditions vary so widely that 7 days can be too little. The key is to watch for a dramatic and consistent rise in the container – at least doubling between 6-8 hours after feeding. This could be 7 days or less after you begin or it could be up to a couple of weeks. Watch for this benchmark, rather than watching the calendar.
On Day 7, discard the jar’s contents down to 50g of the mixture and add 50g whole grain rye flour, 50g unbleached all-purpose flour and 100g water.
Repeat this feeding twice a day, once in the morning and once in the evening, indefinitely.
Your new starter is ready to bake with when it’s reliably very bubbly and doubling in size within 6-8 hours of feeding. That’s why it’s useful to feed your starter in a clear, straight-sided container, so it’s easy to track its upward progress. You can also use a rubber band around the jar to mark the starting point. Ripe starter will be viscous, not thin and if you taste a tiny bit, it will be nicely balanced between rich flavor and acidity.
When sourdough starter is neglected – left on the counter or in the refrigerator for extended periods without being fed – the yeast and bacteria run out of food and their populations gradually decline. The longer it’s left unfed, the more difficult it will be to revive. Regularly feeding your starter can prevent this. If you do forget to feed your starter for a while, a series of regular feedings should restore its health.
Sourdough starter should smell sharply sour but with no overtones of spoilage or chemical smell. When starter is neglected for an extended period, the liquid on top tends to turn from clear to dark. That’s OK; simply stir the liquid back into the starter and feed it the meal it’s craving. However, if the starter shows visible signs of mold, an orange or pink tint or streak or smells bad, throw it out and start over.
Photo credit: Boudin Bakery and Tasty

Be a Memorable Holiday Party Guest
This is the 2025 satirical Chaotic Culinary Edition. You want to be the guest everyone rem

Step Aside, Turkey
Thanksgiving dinner is the Oscars of food, and while the turkey thinks it’s the Best Pic

Johnnycake Cobbler
Some desserts whisper. This one hollers “Yeehaw!” from the Sonoran sunset. I’m talki